Otter Class: Aircraft Project Mid-Project Summary

Hi again!  As promised, here’s a quick and dirty description of what the children have been doing, what they plan to do, and what I’ve observed them learning.  There’s also a useful link at the bottom.

In the previous posts, I didn’t describe these additional activities in which the children engaged:

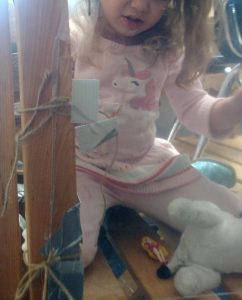
  • Measured their feet to figure out how big to make the pedals
  • Measured a piece of wood to match (picture below)
  • The door cracked — they fixed it.
  • Pretended to go on a flight
  • Felt the sensation of wearing a real pilot’s headset
  • Continued learning how to read maps
  • Began learning about scale and its relationship to the phenomenon that things look smaller when they are farther away

Every pilot needs a flight bag containing vital equipment and information.

With two weeks to go before break, the students plan to:

  • Install port side wing strut
  • Make and install instrument panel
  • Paint the Piper logo (link is not an endorsement, just a reference!) on the first control yoke and install
  • Build, paint, and install second yoke
  • Possibly add the pedals and rudder

The kneeboard…

…holds the flight map securely to the pilot’s leg.

The pilot can’t drop it and never needs to hold it in their hands.

From an educator’s perspective, the students have been using and building a variety of skills and abilities:

  • book research
  • guided internet research
  • working with a subject matter expert (Mrs. Linstromberg)
  • using uniform, non-standard tools to take linear measurements for authentic purposes
  • solving problems using math
  • using divergent and convergent thinking to solve problems
  • writing (students made labels for various parts of their plane)
  • conducting physics experiments (cars on the wing)
  • iterative design:
    • evaluating the effectiveness of a strategy or technique
    • imagining and/or learning of new techniques to try
    • trying them
    • re-evaluating, re-imagining, re-trying…
  • reading diagrams of airplane parts
  • expanding fine motor skills through cutting and pasting a collage of aircraft
  • expanding gross motor skills through finding new ways to get in and out of the climber with the new door and with no slide attached

A white light in the cockpit would dangerously affect the pilot’s vision. A red light is used to illuminate anything the pilot needs to see inside.

Perhaps most important, I believe the students have been building the following dispositions:

  • the belief that they are autonomous beings whose contributions are valuable to themselves and to others
  • curiosity
  • as they see me learning from Mrs. Linstromberg, I believe they are seeing that learning is a lifelong, enjoyable endeavor
  • cooperation
  • creativity and inventiveness
  • problems are for solving and they have the capacity to solve them
  • persistence

measuring the wood we’ll use to make the pedals

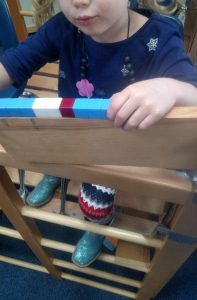
Later, I found this.  A student had measured it all the way around…just for fun.

There are several sets of new photos to be enjoyed on the Otter Class Protected Images Page.  Click, enter your password, and enjoy!!

Otter Class: Aircraft Project Update

building the car wash (the gauzy fabric hanging down was the simulated water, the rope became the washing tentacles)

The airplane project started a few days after the students had built a car wash in the classroom.  The car wash had been a good springboard for pretend play, emergent writing (signs are needed to tell people where the entrance and exit are), useful conflict, and a great deal of laughter.  Students had installed the long washing tentacles that are so impressive when we first experience a car wash (I still think they’re pretty coo!) and blue fabric that simulated water.

making exit and enter signs


lets get clean!

When they decided to build an airplane, they first used blocks to build pilot seats.  It was an elaborate set up but a precarious one.   

It needed constant repair.

colored masking tape: our first favorite connecting strategy

They didn’t very much mind fixing it every few minutes. 

I guess that’s how it is sometimes with things we build from the heart.


“Don’t knock it down.”

“Please leave that alone. CHECK MARK!”

But with the car wash in the same space, the new airplane completely blocked the aisle.  The students were comfortable dismantling the car wash; it had lived its useful life.  Still, several people tripped on the pilot-seat blocks while trying to enter and exit the room, so we all agreed we needed to move the plane to a new location.

I suggested using the climber.  Everyone agreed, but some students were reluctant.  I felt conflicted.  On one hand, several children fell on the blocks and my adult eyes saw more danger in the future (like exiting in an emergency).  I also know from experience, which the children do not yet have, that the climber has been a rather inspiring canvas on which to create.  On the other hand, the children had created something and they deserved the right to decide its fate.  In the end, I don’t think I really badgered them into it, but I certainly pressed my opinion more than usual.  Fortunately, it has gone very well.

Students first identified the parts we needed to make, based on the knowledge they gained from Mrs. Linstromberg: wings, door, instrument panel, spinner, control yokes, and more.

The wings went up first, but they kept flopping down, so students installed struts using tubes and duct tape. After a few days, the adhesive lost its hold.

At this point in the year, students haven’t built a full toolbox of techniques for connecting things.  I’ll sometimes suggest new ideas for them to try and then add to their repertoire.  As we progress through the year, teachers encourage students to solve problems with the knowledge they possess.  They remember the techniques they’ve learned and choose the one they think is most applicable.  So far, the students have been primarily using tape and glue, along with the occasional use of staples.

For the wing strut, I suggested twine.  I showed students how to make holes in the wing and they threaded the twine through the holes, then we tied it down together.

A few days later it was time to install the door.  A student had suggested plastic for the door, and I pulled some from storage.

“Is this good?” I asked
“No, it needs to be white,” the student replied.
“Do you mean white like a cloud, or white like a translucent window…like this, it’s translucent,” I said, pointing to the glass.
“It needs to be translucent.”

Making the door took a few days. A student used unifix cubes to measure the width and height of the door opening,

transferred those measurements to the plastic, 

and then the cutting began.  Everyone took a turn cutting out the door panel (one picture is missing, it was in the previous post).


Finally, the door was ready to install. Students first tried out their current go-to strategy: duct-tape.

removing the protective film

When that failed, I didn’t tell them what to try next, but guided them to think of other connecting things they’d used recently.  Looking around the plane, one student noticed the twine and the light seemed to turn on.  ”That string!! Let’s go get some!”

The door is so translucent, you can’t really see that it’s there…

…but it is. See the duct tape apparently hanging in mid-air?

Did I mention I live for this stuff?!

Some students have been less deeply inspired by the plane but have still found ways to match their interests with the project.  Each day, these students have conducted intense research into the variables that cause toy cars to travel in different directions and speeds when placed on the wing.

“there it goes!” “where?” “that way!”

Meanwhile, other students worked on the yoke.  We’d collected some cylinders that would work well for the handles, but the central connecting part posed a challenge.  Students traveled the room looking for materials.  Mrs. Linstromberg gave little clues, “well, it should be square…”

In what seemed like a burst of excitement, a student said, “that!”
“What?” Mrs. Linstromberg asked.
“That block, the number one, it’s a square!”

With their trusty duct tape in hand, students connected all the parts and painted them black, just like the real thing.

Unfortunately, the next day, we arrived to see the black paint did not take to the plastic surface of the duct tape and flaked off.  Another problem to solve!

They did indeed solve that problem too but this post can’t go on forever (“too late!”).  Thanks for reading this far!!

OK, I know you have other things to do, so I’ll wrap it up here.  Tomorrow, just bullet points!